Howto Read Microsoft Home Server Disks On Mac
Each network-compatible device has at least one unique hardware ID – the media access control address (in short: MAC address). What this is all about and how you can find or rewrite the MAC address is explained below.
The first step, of course, is to physically remove the offending disk from the Windows Home Server. If possible, it is best if one is able to remove the drive from the storage pool, however if there is a massive hardware failure or the drive dropped from the WHS pool, one may need to remove the drive without going through the formal process.
- What is a MAC address?
- Finding out your MAC address: a how-to guide
- Assigning the MAC address using software
- Mar 31, 2020 If this is the case for you, right-click the drive you want to format and click Initialize Disk. This will prompt a new window asking you to select a partition style for your disk. If you’re going to be using the drive with a version of Windows prior to Windows Vista, you’re going to want to go with MBR.
- Simple and easy to use, MacDrive is recognized as the leader for accessing Mac disks from Windows for almost 20 years. Once you plug in your Mac disk, behind the scenes MacDrive works to seamlessly enable Windows understand HFS+ disks and allow you to read and write to the disk.
- Oct 12, 2017 Move disks to another computer.; 3 minutes to read; In this article. Applies To: Windows 10, Windows 8.1, Windows Server (Semi-Annual Channel), Windows Server 2016, Windows Server 2012 R2, Windows Server 2012 This section describes the steps to take, and the considerations associated with, moving disks to another computer.
What is a MAC address?
Each device that is integrated into a computer network requires a network adaptor. This adapter receives a worldwide unique identification number from the manufacturer: the MAC address. This enables devices like desktop computers, tablets, or mobile phones to be identified in the network and addressed as required. If a device has several network adapters (for example, for several LAN connections or different communication standards like Ethernet, WiFi, FDDI, Bluetooth, or Token Ring), a different address is available for each standard.
The MAC address (short for media access control address) is the worldwide unique hardware address of a single network adapter. The physical address is used to identify a device in computer networks.
Since MAC addresses are assigned directly by the hardware manufacturer, they are also referred to as hardware addresses. With Microsoft Windows, the MAC address is referred to as the physical address. Apple uses the terms Ethernet ID, Airport ID, or WiFi address, depending on the communication standard. The term device address, on the other hand, is fuzzy, since a device can have several network adapters and therefore different MAC addresses.
The MAC address in practice
Conflicting MAC addresses are a basic requirement for error-free network communication.
Data transmission in computer networks is a complex communication process in which different requirements including reliability, security, and efficiency must be met. This can be illustrated using the OSI models (abbreviation for open systems interconnection) – a reference model developed by the ISO (International Organization for Standardization) that maps network communication to 7 layers. During data transmission, each layer of the OSI model is run through on both the sender and receiver sides.
MAC addresses are used on the backup layer (layer 2) of the OSI model – actually, the media access controlsublayer introduced by the Institute of Electrical and Electronics Engineers (IEEE).
In the extension of the OSI model designed by the IEEE, the backup layer (layer 2) is divided into the sublayers media access control (2a) and logical link control (2b).
The backup layer is located between the bit transfer layer (layer 1) and the switching layer (layer 3). While the bit transmission layer provides protocols and tools responsible for maintaining the physical connection, protocols on the backup layer control how different systems share the available transmission medium. Secure system connections are abstracted from the physical connection. The actual transmission of data packets takes place at the switching level via IP.
For example, if you want to send an IP packet over Ethernet, your computer transmits a data frame that is addressed to the target computer’s MAC address on the backup layer, according to the OSI model.
If the target computer is not in the local network, a router is addressed and instructed to forward it to the internet. Routers integrated into a social network also have a unique MAC address.
An Ethernet data frame contains information that is read out at different levels of the OSI model.
Data frames in IPv4 networks contain the following components:
- Destination address (destination computer MAC address)
- Source address (sender’s MAC address)
- Control information for data flow control
- User data (the data packet that needs to be transmitted later on the switching layer)
- Checksums that ensure data integrity
A target computer that receives a data frame first reads it on the backup layer and compares the target address of the frame with its own MAC address. If the addresses match, the target computer starts interpreting the frame at the next higher level.
Network devices that are only used to forward data packets (repeaters) or manage parts of the network (bridges and switches) usually do not actively participate in network communication and so do not require their own MAC addresses.
To link the address assignment on the backup layer with the address assignment on the switching layer, the address resolution protocol (ARP) is used in IPv4 networks. Each computer in the local network maintains an ARP table whereby IP addresses are assigned to MAC addresses.
ARP is vulnerable to an attack pattern called ARP spoofing. The danger of ARP spoofing and the countermeasures you can take are discussed in the article above.
The new internet protocol standard IPv6 uses the neighbor discovery protocol (NDP).
MAC address syntax
MAC addresses in LAN or WLAN networks consist of 6 bytes (48 bits) and are written in hexadecimal notation. The use of separators such as hyphens or colons between two bytes increases readability.
The following example shows the MAC address of a desktop computer in binary and hexadecimal format:
In our example, we use canonical representation of the bit sequence. This corresponds to the order in which MAC addresses are transmitted in Ethernet. Other communication standards like Token Ring provide for bit-reversed transmission, starting with the most significant bit.
The bit sequence of each MAC address is divided into 4 areas, each of which encodes different information.
- Bit 1 (receiver): The first bit of the MAC address specifies whether it is an individual or group address. This bit is called I/G (short for individual/group). If I/G = 0, it is a unicast address for a single network adapter. Multicast addresses are identified by I/G = 1 and are addressed to several receivers.
- Bit 2 (registry): The second bit of the MAC address indicates whether it is an address with global validity (universal) or whether the address has been assigned locally (local). The bit is called U/L. If U/L = 0, the address is valid worldwide as a universally administered address (UAA). Addresses that are only locally unique are called locally administered address (LAA) and are marked with U/L = 1.
- Bit 3–24 (manufacturer identification): Bits 3 to 24 encode an identifier (organizationally unique identifier, OUI), which is assigned exclusively to hardware manufacturers by IEEE. The assignment of OUIs is usually public and can be determined via databases. A corresponding service is available, for example, on aruljohn.com.
- Bit 25-48 (network adapter identifier): Bits 25 to 48 provide device manufacturers with 24 bits for assigning a unique hardware identifier (organizationally unique address, OUA). This means that 224 (= 16.777.216) unique OUAs can be assigned per OUI.
Table: Subareas of an MAC address
Label | I/G | U/L | OUI | OUA |
Bit | 1. | 2. | 3.–24. | 25.–48. |
Function | Recipient group | Awarding office | Manufacturer code | Network adapter identification |
Finding out your MAC address: a how-to guide
MAC addresses can be queried through the terminal in all modern operating systems with little effort – both on the local system and remotely in the network. The following table shows the corresponding command line commands for the most common operating systems.
Table: MAC address read out
| Operating system | Terminal command | Remote |
|---|---|---|
| FreeBSD | ifconfig | arp -a |
| NetBSD | ifconfig -a | arp -a |
| OpenBSD | ifconfig -a | arp -a |
| Linux | ip link | ip neigh |
| Mac OS X / macOS | ifconfig | arp -a |
| Solaris | ifconfig -a | arp -a |
| Windows XP Professional | getmac /v | arp -a |
| Windows (ab 2000) | ipconfig /all | arp -a |
On mobile devices, you can display the MAC address in the settings.
Table: Get MAC addresses on mobile devices
| Operating system | Local |
|---|---|
| Android | Settings > Phone Information > Hardware Information |
| Apple iOS | Settings > General > Info > WiFi address |
| Windows Phone 7 | Settings > Info > More Information |
Read MAC address locally
If you want to read out the MAC addresses of the LAN and WiFi adapters on your Windows computer, proceed as follows if using Windows 10.
Step 1: Open the terminal of your operating system. For example, use the keyboard shortcuts [Windows button]+[R]. Then enter “cmd” in the window “Run” and confirm with “OK.”
Step 2: From Windows 2000 onwards you can use the command line utility ipconfig with the “/all” option to get the MAC address of all network adapters on your Windows computer.
Alternatively get the MAC address with the command “getmac /v”
Step 3: With Windows, the MAC address is displayed under “physical address.”
Accessing your MAC address remotely
Thanks to ARP, in IPv4 networks it is possible to determine other devices’ MAC addresses in the same local network. With Windows and most unixoid operating systems, use the command line “arp” with the option to display you system’s ARP table in the terminal.
You will receive a terminal output according to the following scheme:
If you just want to read the MAC address of a specific network adapter remotely, use the command “arp –a” in a combination with the target adapter’s local IPv4 address.
Assigning the MAC address using software
MAC addresses are invariably assigned by device manufacturers and are “burned” into the network adapter chip on the hardware side. However, numerous operating systems offer the option to overwrite hardware addresses on the software side. This is referred to as spoofing. In this case, a system does not send the addressed adapter’s real network hardware address in network communication, but instead a user-defined MAC address.
Assigning an MAC address in Windows
With Windows, you can overwrite the MAC address through the device manager if the network adapter’s device driver supports this function.
Step 1: Open the network adapter settings. To do this, follow the click path: Start à Settings à Network and Internet à Ethernet à Change Adapter Options
Step 2: Right-click on the desired network adapter and select “Disable” in the context menu.
Step 3: Right-click on the desired network adapter and select “Properties” from the context menu. A pop-up window opens called “Network adapter properties.”
Step 4: Click on the “Configure” button in the pop-up window and select the “Locally Administered Address” property under “Advanced.” Enter your chosen software MAC address under “Value.”
Assign MAC address in unixoid operating systems
Unix derivatives such as Linux, macOS, Solaris, and the BSD operating systems support the assignment of MAC addresses through the terminal on the software side.
Table: Overwriting a MAC address
Operating system | Terminal command |
Linux | ip link set dev <Interface> addr XX:XX:XX:XX:XX:XX or ifconfig <Interface> promisc and finally ifconfig <Interface> hw ether XX:XX:XX:XX:XX:XX |
Mac OS X / macOS | ifconfig <Interface> ether XX:XX:XX:XX:XX:XX |
Solaris | ifconfig <Interface> ether XX:XX:XX:XX:XX:XX |
FreeBSD | ifconfig <Interface> link XX:XX:XX:XX:XX:XX |
ifconfig <Interface> link XX:XX:XX:XX:XX:XX activate | |
OpenBSD | ifconfig <Interface> lladdr XX:XX:XX:XX:XX:XX |
We illustrate the procedure using the most commonly used Unix derivative: Linux. If you want to change your network adapter’s MAC address, proceed as follows.
Step 1: Open the operating system terminal – for example, with the key combination [CTRL]+[ALT]+[T].
Step 2: Determine the name and current MAC address of the desired network adapter. To do this, enter the following command in the command line:
Note the hardware address assigned by the manufacturer in case you want to undo the change.
Step 3: Turn off the network adapter by entering the following command in the command line:
Enter the name of the network adapter determined through “ip link” for <Interface>.
Step 4: Overwrite the network address assigned by the manufacturer with one of the options specified in the table.
Enter the chosen MAC address instead of XX:XX:XX:XX:XX:XX
Step 5: Restart the network adapter. Use the following command line command:
To ensure that the selected network adapter is accessible at the MAC address you selected, re-read the network information with “ip link” (see step 1).
Applies To: Windows 10, Windows 8.1, Windows Server (Semi-Annual Channel), Windows Server 2016, Windows Server 2012 R2, Windows Server 2012
This section describes the steps to take, and the considerations associated with, moving disks to another computer. You might want to print this procedure or write down the steps before attempting to move disks from one computer to another.
Note
You must be a member of the Backup Operators or Administrators group, at minimum, to complete these steps.
Verify volume health
Use Disk Management to make sure the status of the volumes on the disks is Healthy. If the status is not Healthy, repair the volumes before you move the disks.
To verify the volume status, from the View menu, check the Status column in the Volume List view, or under the volume size and file system information in the Graphical View.
Uninstall the disks
Uninstall the disks you want to move using Device Manager.
To uninstall disks
Open Device Manager in Computer Management.
In the device list, double-click Disk drives.
Right-click the disks you want to uninstall, and then click Uninstall.
In the Confirm Device Removal dialog box, click OK.
Remove dynamic disks
If the disks you want to move are dynamic disks, in Disk Management, right-click the disks you want to move, and then click Remove Disk.
After having removed dynamic disks, or if you are moving basic disks, you can now physically disconnect them. If the disks are external, you can now unplug them from the computer. If the disks are internal, turn off the computer, and then physically remove them.
Install disks in the new computer
If the disks are external, plug them into the computer. If the disks are internal, make sure the computer is turned off and then physically install the disks in that computer.
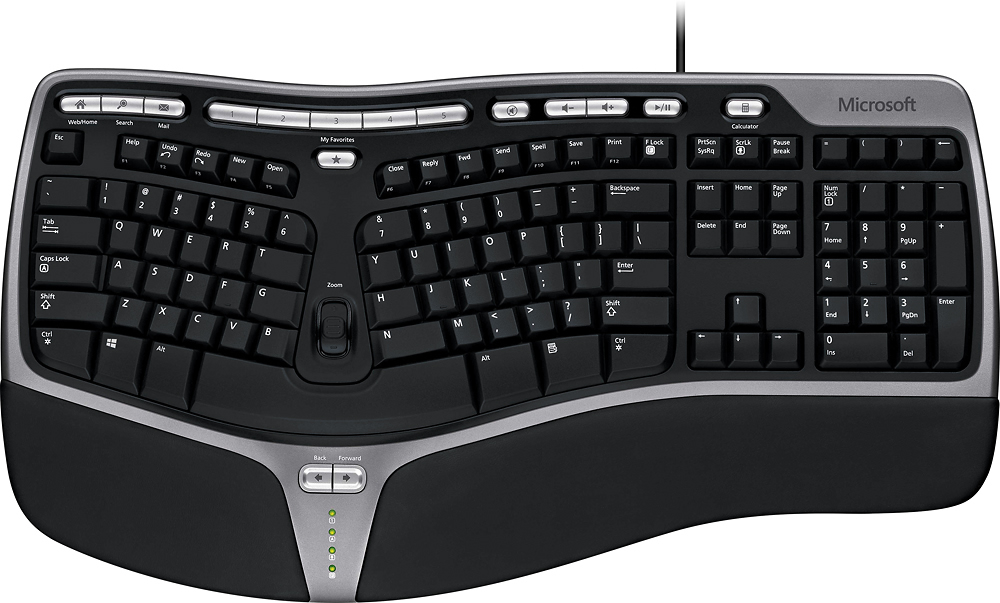 Microsoft Natural Ergonomic Keyboard 4000 makes day-to-day tasks easier with a more natural wrist alignment. It includes hot keys, multimedia keys, a palm rest and more. This site uses cookies for analytics, personalized content and ads. By continuing to browse this site, you agree to this use. The Microsoft Natural Ergonomic Keyboard 4000 doesn’t feel very “Mac-like”, at least not out-of-the-box. Read on for helpful settings to improve the experience, and a brief review of the keyboard at the end.
Start the computer that contains the disks you moved and follow the instructions in the Found New Hardware dialog box.
Microsoft Home Server Requirements
Detect new disks
- On the new computer, open Disk Management.
- Click Action and then click Rescan Disks.
- Right-click any disk marked Foreign.
- Click Import Foreign Disks and then follow the on-screen instructions.
Additional considerations
How To Read Microsoft Home Server Disks On Mac Windows 10
When moved to another computer, basic volumes receive the next available drive letter on that computer.
Dynamic volumes retain the drive letter they had on the previous computer. If a dynamic volume did not have a drive letter on the previous computer, it will not receive a drive letter when moved to another computer. If the drive letter is already used on the computer where a volume is moved, the volume receives the next available drive letter.
If an administrator has used either the mountvol /n or the diskpart automount command to prevent new volumes from being added to the system, volumes moved from another computer are prevented from being mounted and from receiving a drive letter. To use the volume, you must manually mount the volume and assign it a drive letter using Disk Management or the DiskPart and mountvol commands.
If you are moving spanned, striped, mirrored, or RAID-5 volumes, it is highly recommended that you move all disks containing the volume together. Otherwise, the volumes on the disks cannot be brought online and will not be accessible except to delete them.
You can move multiple disks from different computers to a computer by installing the disks, opening Disk Management, right-clicking any of the new disks, and then clicking Import Foreign Disks. When importing multiple disks from different computers, always import all the disks from one computer at a time. For example, if you want to move disks from two computers, import all disks from the first computer and then import all disks from the second computer.
Disk Management describes the condition of the volumes on the disks before they are imported. Review this information carefully. If there are any problems, this information will tell you what will happen to each volume on these disks once the disks have been imported.
If you move a GUID Partition Table (GPT) disk containing the Windows operating system to an x86-based or x64-based computer, you can access the data, but you cannot boot from that operating system.